Quick Brunch recipe: Shakshouka with Cheese

It’s been said that breakfast is the most important meal of the day, but between work and school, it seems that everyone is in a rush these days. No time to spare before running out the door each morning. Then after a long week, most of us want to enjoy our weekend with a couple of extra hours of sleep! How can we get the family together again? Brunch! The best part is that it is so easy because there is so little cooking involved.


Set out bowls of olives, fig jam, gishta, lebna, and plates of cheese and turkey slices, all which are easily available at the deli counter. Keep life simple! Then, prepare these individual portions of shakshouka and allow them to be the star of the show! Make sure that there is plenty of hot bread and a very large pot of tea!

Now, I can’t claim that preparing these eggs and serving all of these delicious little sides will solve all of life’s problems, but they might go a long way towards getting a group of people smiling on a weekend morning!

Ingredients:

  • Extra large eggs
  • Puck cheese
  • 1 large onion, finely chopped
  • 2 large tomatoes, chopped
  • 1 cube maggi
  • 1 tsp. buharat
  • ½ tsp cinnamon
  • Olive oil

Directions:

Fry onions in olive oil over medium heat until they begin to go golden in color. This means that the onions are caramelizing and the flavor becomes mild and slightly sweet. Add the tomatoes, maggi, and spices, and cook until the tomatoes form a deep colored, delicious sauce.

Spoon this sauce into four individual ramekins. Be generous! Then put a well-rounded teaspoon of Puck cheese in the center of each one. Crack an egg into each dish. (For bigger appetites, crack two eggs into each dish)

shakshouka-collage

Place the ramekins into a baking dish which has about half an inch of water in the bottom. Place into a very hot oven for 15 to 20 minutes, depending on how soft or firm you like your eggs. When done, run a knife around the edge of each egg to loosen, and carefully invert each onto a small plate, and serve.

Read More...

Easy Peasy Beef Rice Recipe

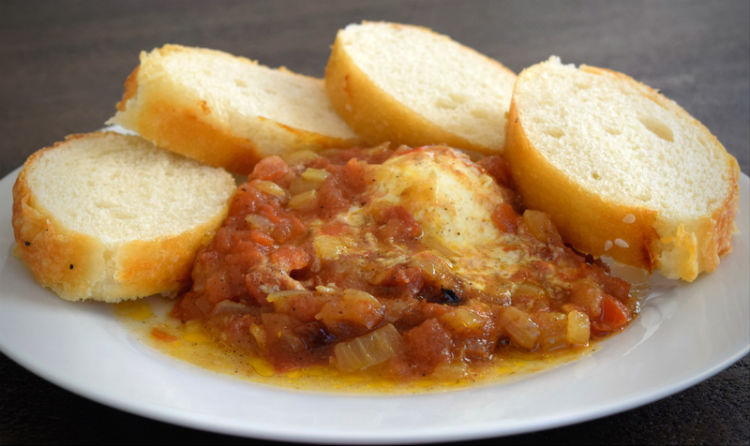
I love to cook, but when my children were very young I didn’t always have the time or the energy to prepare anything elaborate meals. I needed a meal that was a group pleaser, as well as being nutritious, with the minimum of time and cleanup.


Rice with beef and peas was a ‘go to’ dish back then, and it still is. Because my children have fond memories of this dish, they now prepare it in their own homes when in a hurry! Served with a green salad, this is a well-rounded meal, although personally, I prefer to serve it with a cucumber/yogurt salad with a touch of fresh mint thrown in. Comfort food done right!

Tip: Want to make this dish even easier? Cook up a big batch of the meat mixture and freeze it in portions. When you need a meal in a hurry, simply pull the already cooked meat out of the freezer to thaw, then cook with the rice and peas as directed.

Ingredients:

  • 1 lb ground beef
  • 1 coffee mug basmati rice *
  • 1 c frozen peas
  • 1 medium onion, finely chopped
  • 2 cloves garlic, minced
  • 1 tsp cumin
  • 1 tsp coriander powder
  • ½ tsp allspice
  • Salt and pepper to taste

Directions:

1. Place chopped onion, minced garlic and ground beef in a pan and brown over medium heat. If using regular ground beef, the fat in the beef will render out and cook the onion, but if you are using extra lean ground beef, add about 3 Tbsp of olive or vegetable oil to assist in the frying and to enhance the flavor of the onion and garlic.

2. When the beef is just browned, add the spices mixing them well throughout the beef. Then add salt and pepper to taste, allowing the beef mixture to be a little oversalty as the rice will need this.

3. Add the coffee mug of rice to the beef mixture along with 1 c. peas and 1 ½ coffee mugs of water. Stir and bring to a boil over high heat. As soon as the water begins to boil, lower the heat to minimum and cover tightly with a well-fitting lid. Leave the rice to cook for 20 minutes without lifting the lid or stirring the contents. At the end of 20 minutes, lift the lid and use a fork to check if all water is absorbed. Fluff the rice, replace the lid, and allow to rest for 5 minutes.

Serves 4 as a main dish or more as a side.


* I have always used a coffee mug to measure my rice. It gives me just the right amount, whereas a measuring cup is not quite enough, but 2 measuring cups is too much.

Read More...

Tea Time Date and Cardamom Scones

I have a real weakness when it comes to pastries, and I can’t imagine tea time without a little something yummy to munch on. Of course, it’s a real bonus when great taste is combined with good nutrition, and these scrumptious, easy to make scones have an abundance of both!


Whole wheat provides fiber while sweet, sticky dates are a great source of B vitamins, iron, potassium, and magnesium. There is even a pinch of calcium and a dash of protein. Who can say no to that?

Ingredients

  • 1 cup all-purpose flour
  • 1 cup whole wheat flour
  • 3 ½ teaspoons baking powder
  • 1 teaspoon finely ground cardamom
  • ½ teaspoon salt
  • ½ cup butter
  • ¼ cup sugar (more for a sweeter scone)
  • 1 egg
  • 1 cup milk
  • 1 ½ cup chopped dates

Directions

  • Preheat oven to 200° C  (400° F)
  • Whisk together the flour, whole wheat flour, baking powder, cardamom and salt in a bowl.
  • In a separate bowl, using an electric mixer, cream together the butter and sugar.  Add the egg and milk to the sugar and butter and continue mixing for one minute. When well blended, remove the electric mixer as it is no longer needed. Using a large spoon, stir the dates into this mixture, then add the entire flour mixture and stir just enough to moisten. Do not overmix.
  • Now, divide the dough into two equal portions and roll each into a ball. On a floured countertop, flatten each ball into circles about 2 cm thick. Slice each circle into 6 wedges, as though you are slicing a pizza. Carefully place the now triangular scones onto a buttered baking sheet and place into the pre-heated oven for about 18-20 minutes.

Read More...

Nourishing Vegetable Medley

I adore stopping by the little fruit and vegetable stands that seem to pop up all over the city. Boxes of fresh pomegranates, cartons of dates or piles of juicy, sweet melons. There is one stand in particular near my house that always has buckets full of fresh kousa, plump purple eggplants, and delicious sweet bell peppers. I feel healthier just looking at them!


Because our traditional diet tends to be a little heavy on meat, I appreciate finding ways to get my family more interested in vegetables. One way I do that is to make a batch of this vegetable medley. I combine these luscious vegetables into a thick, chunky fusion of flavors and serve with crusty bread for scooping. Alternatively, it is wonderful heaped over pasta.

Ingredients:

  • 1 large eggplant
  • 5 kousa
  • 1 large red or yellow sweet bell pepper (I like a combination of both)
  • 1 can diced tomatoes (Do not drain the juice)
  • 1 large onion
  • 3 cloves garlic
  • 1 handful of cilantro
  • 1 tsp cumin
  • ¼ tsp. each cinnamon, nutmeg, black pepper and chili flakes
  • 1 chicken or vegetable maggi
  • Olive oil
  • 1 small teacup of water

Coarsely chop the onion, eggplant, kousa, and bell pepper, then veg medley (1)finely chop the garlic and cilantro.  Pour a generous quantity of good quality olive oil into a heavy bottomed cooking pot. (I prefer stainless steel, as this dish uses very little liquid and lightweight aluminum cookware is more likely to allow the vegetables to scorch)

Add the onions to the olive oil and fry over medium heat for 4-5 minutes until they start to soften, then add the garlic and leave for another 1-2 minutes. When the garlic becomes fragrant, add the eggplant, kousa, red or yellow bell pepper, the spices and maggi, and the can of tomatoes. Give the pot a big stir. Add the small teacup of water, then cover with a lid, lower the heat and allow the vegetables to cook for 30-40 minutes until the vegetables are very soft and the flavors have blended. Check occasionally to make sure that there is just enough liquid to keep the vegetables from sticking to the bottom of the pot, but avoid excessive stirring, as this can crush the softened vegetables into a mush.

When finished cooking, taste and adjust for seasoning, adding salt and more black pepper if needed. Serve in beautiful pottery bowls to compliment the rustic look of this earthy dish.

Read More...

Eggplant Boats With Middle Eastern Spices

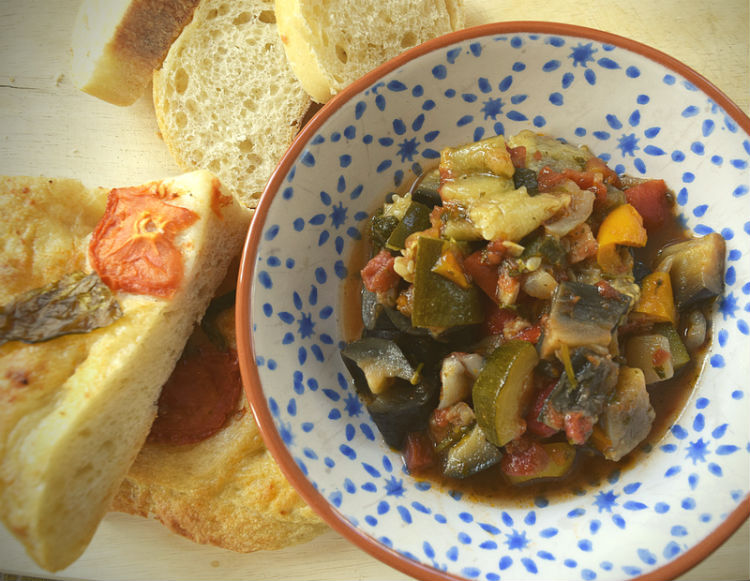
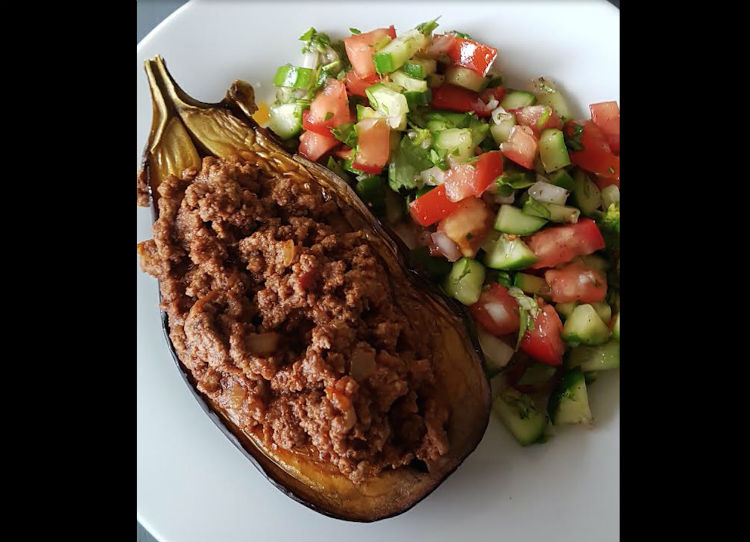
Wow your family and friends with these darling little eggplant boats by serving up a big dollop of flavor with less oil than many traditional eggplant dishes. 


The secret is in baking, rather than frying, the eggplants to their tender, flavorful best.

Ingredients:

  • 2 medium eggplants
  • Olive oil
  • 500 g (1 lb) ground beef or lamb
  • 1 onion, finely chopped
  • 2 tomatoes, chopped
  • 2 tsp. tomato paste
  • 2 cloves garlic, minced
  • 2 tsp. baharat (mixed spices)
  • Salt and pepper to taste

Directions:

  • Without removing the stem, slice the eggplants in half lengthwise, then lightly brush with olive oil and place in a preheated oven, cut side up. Bake until completely soft and a beautiful golden brown.
  • Heat a small amount of oil in a pan and add the onions. Sauté until just beginning to turn golden on the edges, then add the ground beef or lamb and cook till nearly done through. At this point, drain off any excess oil. Return pan to the flame and add the garlic, tomatoes, tomato paste, baharat, salt, and pepper and continue to cook until the meat is well done and the flavors have melded together.
  • Leaving the eggplant in the baking dish, slice partway down the center of each, carefully pulling it open just enough to stuff some of the meat mixture inside. Divide the meat evenly between them, piling the rest over top, then return to the oven for 8-10 minutes. Serve on individual plates with a nice salad.

Happy eating!

Read More...